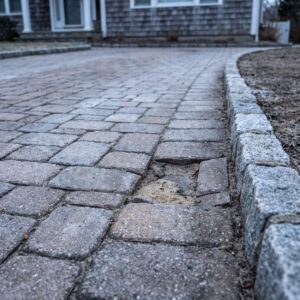
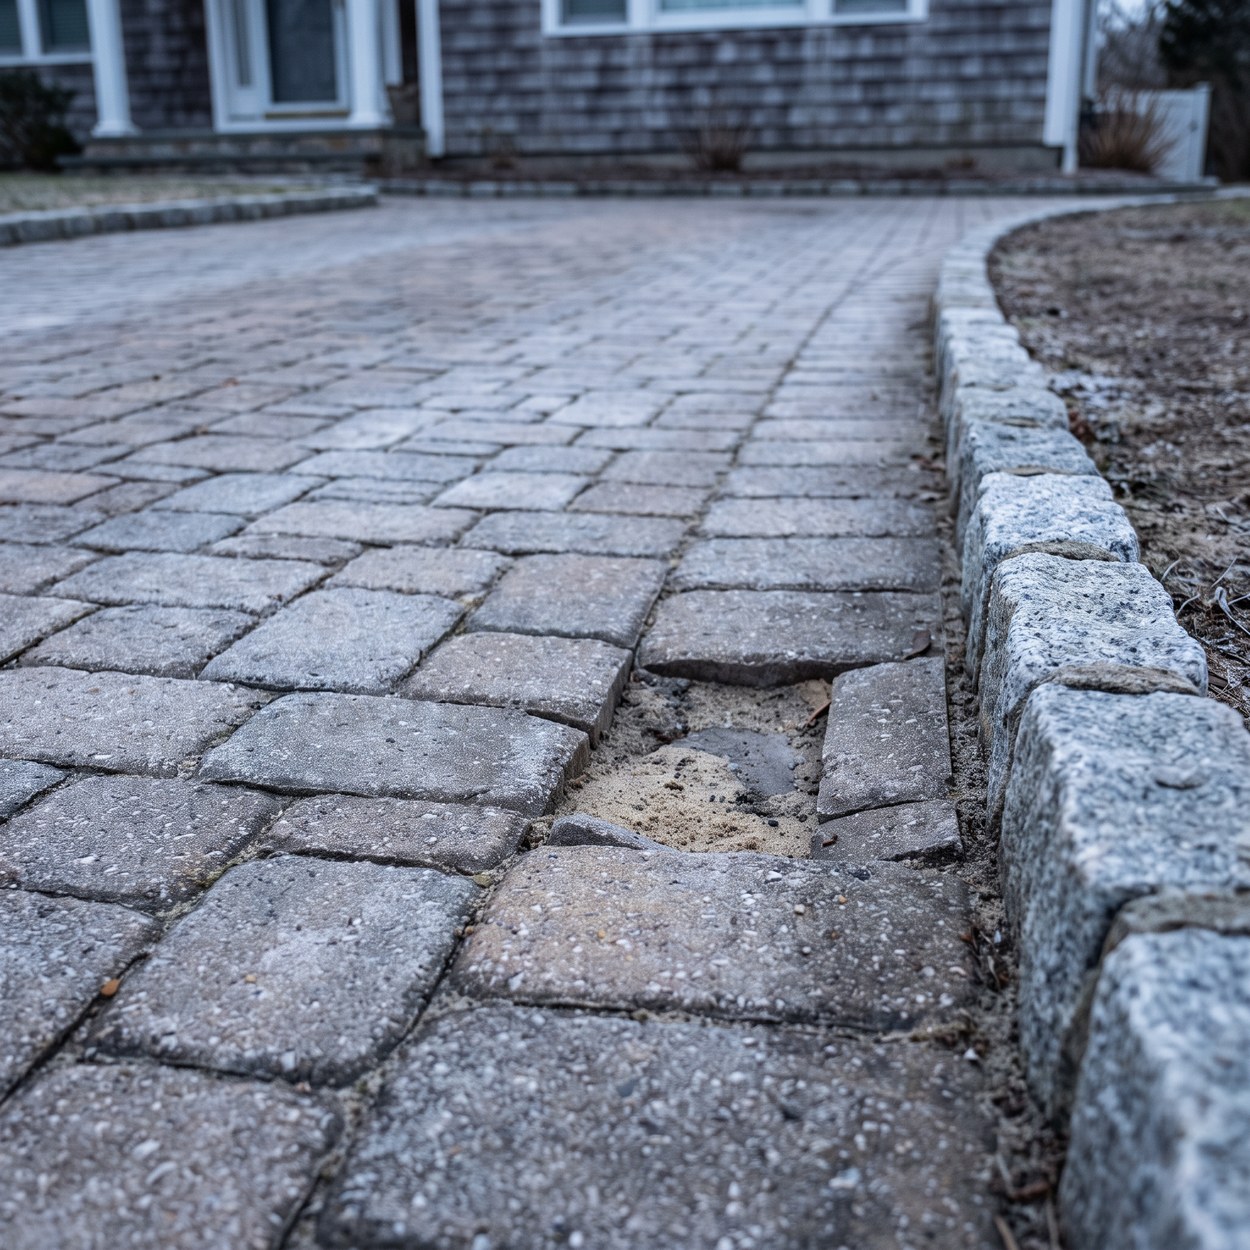
TLDR: Paver driveway maintenance on the barrier islands comes down to four checks: full joints, a sound edge restraint, level wheel tracks, and water that leaves the surface instead of standing on it. Joint sand fails first here, because coastal storm water moves fine material out of the joints faster than an inland site loses it, and nearly every other problem starts once the joints run empty. A walk before winter catches all four while the corrections are still small, which on a paver surface means topping joints and resetting an edge rather than relaying a field. Boyes walks driveways in Wildwood Crest and Diamond Beach before the weather turns and puts what we find in writing.
Paver driveway maintenance is the scheduled upkeep of the four systems that hold a segmental pavement together: the sand filling every joint, the restraint locking the perimeter, the compacted base and bedding carrying the load, and the slope moving water off the surface. It is inspection and small correction, not resurfacing.
What Does Paver Driveway Maintenance Actually Involve?
Maintenance on a paver driveway is four checks and two small corrections, not an annual treatment. The checks are the joints, the edge restraint, the wheel tracks, and where water goes. The corrections are topping up joint sand and resetting an edge or a settled section.
That framing matters because a paver surface fails in a predictable order. Joints empty first. Individual pavers then begin to move independently under load, pushing outward against the restraint, and once the restraint gives, the field spreads and the joints open wider still.
Nothing in that chain starts at the paver itself. Concrete and clay units outlast the assembly around them, so a driveway that looks tired is almost never a paver problem. It is a joint, edge, or base problem showing through the surface.
The practical consequence is that upkeep is cheap and repair is not, in time as much as anything else. A joint top-up is an afternoon. A relayed section is a day with a plate compactor and a saw. Most of our work on paver driveways is catching the first before it turns into the second.
Why Does Joint Sand Matter More Than the Pavers?
Joint sand is a structural component of a paver driveway, not a finishing detail. Full, compacted joints lock the units together so a wheel load spreads across many pavers instead of pressing on one. Empty joints turn a locked field into loose pieces sitting side by side.
That is the whole mechanism of interlock. A paver with sand tight on all four sides cannot rock, cannot tilt, and cannot drop below its neighbors. Take the sand out of two of those joints and that paver carries the tire alone.
The damage shows at the edges of the units first. Unsupported pavers chip along the top edge where they contact each other, and once a chip starts, that joint holds less sand than before. In our field experience, chipped corners on an otherwise sound driveway record how long the joints sat empty.
Joint loss also opens a path into the bedding layer. Water that should run off the surface starts running into it instead, and bedding sand that stays saturated stops behaving like a bedding layer.
How Do You Know When Joints Need Refilling?
You look into the joint rather than at the driveway. Boyes checks joint depth with a screwdriver blade or a key: run it along the joint and watch how far it drops before it stops. A joint that swallows the blade is empty, and a joint that stops it near the surface is doing its job.
Do that in four places at minimum: at the street apron, in both wheel tracks, at the garage transition, and along the outside edge. Those are the zones that lose sand first, and a driveway can be full through the middle and low at all four.
The visible signs arrive later than the measurable ones. Sand fanned across the surface after a heavy rain, a shadow line along the joints, and a paver that clicks underfoot all mean the joint is already low.
Refilling is straightforward while the joint still has depth. Angular joint sand or polymeric joint sand is swept in, worked down the full depth, and compacted so it seats instead of bridging across the top. Sand brushed over the surface looks correct for about a week.
What Should an Edge Restraint Check Look For?
An edge check is looking for movement, not for damage. The perimeter of a paver field is under constant outward pressure from every vehicle that crosses it, and the restraint is the only thing resisting that pressure. A small amount of movement at the edge shows up as an open joint several courses into the field.
Walk the full perimeter and look for four things: a restraint that has lifted or rotated away from the pavers, a widening gap between the last course and the restraint, material dropped away behind or beneath it, and a curve where the edge line should run straight.
The most common failure here is the shoulder rather than the restraint itself. Plastic or aluminum restraint is only as good as the compacted base extending past the pavers to support it. Where that shoulder was never built wide enough, or where storm water has carried the soil off the outside of it, the restraint has nothing to spike into and tips outward under load.
That is one reason Belgian block edging suits driveways on the islands. Block set in a concrete footing is a mass edge rather than a spiked one, so it does not depend on the ground behind it staying put. Whichever edge a driveway has, the check is the same: does the perimeter still run true, and is the material behind it still there?
Why Do Paver Driveways Settle in the Wheel Tracks?
Wheel tracks settle because every vehicle loads the same two paths, and repeated load finds the weakest part of the base beneath them. The rest of the driveway carries footsteps. Those two strips carry the car, several times a day, for years.
A dip that follows the tires is a base or bedding problem, and it is not corrected from the top. Slipping sand under sunken pavers moves the void down and buys a season. The durable correction is to lift the affected pavers, fix the layer under them, recompact it, rescreed the bedding, and relay.
Three causes account for most of what we find. A soft pocket in the subgrade that was never dug out during construction. A utility trench backfilled loose and never compacted in lifts. Bedding sand used at installation to bridge a low spot instead of correcting the base under it.
Whether the dip is localized matters more than how deep it is. A shallow depression confined to one wheel track points at something specific below that spot. A whole driveway that has dropped evenly points at base thickness, and that is a rebuild conversation rather than a maintenance one. The difference gets decided long before anyone owns the problem, which is why paver driveway installation choices set the upkeep load for the life of the surface.
How Do Salt and Freeze-Thaw Exposure Change the Job Here?
Salt and freeze-thaw work on the joints and the edges of a coastal driveway, not on the pavers. Water sitting in a low spot or a low joint expands as it freezes, lifts the material around it slightly, and leaves a marginally looser assembly behind when it thaws. Repeat that through a winter and joints that started the season low finish it empty.
Our winters make this a cycling problem more than a deep frost problem. Lower Cape May County sits in USDA zone 7b, and the 2023 USDA zone map assigns zones by average annual extreme minimum winter temperature, shown in 10 degree Fahrenheit zones split into 5 degree half zones. A milder zone this close to the water means the ground spends more of the winter crossing the freezing point than sitting below it, and it is the crossings that move material.
Salt reaches the surface two ways on the islands: out of the air, and off the street during a tidal flood event. Neither harms a properly manufactured concrete paver in a way an owner will notice. Salt in solution does travel through the assembly with the water carrying it, and where it surfaces it can leave a whitish deposit called efflorescence, which is cosmetic and fades with weathering.
The answer to all of it is the same and it is unglamorous: full joints, a sound edge, and water that leaves the surface fast enough that freeze cycling never gets long at it.
What Should a Pre-Winter Walk Cover?
A pre-winter walk is a fixed sequence, and on a typical residential driveway it takes well under an hour. This is the order a Boyes crew works through it.
- Clear the surface first. Leaf litter, drifted sand, and debris hide the exact details the walk is looking for, so the driveway gets swept or blown clear before anything is judged.
- Stand at the low end and sight up the slope. A long low view across the surface reveals dips, high spots, and any line gone out of true.
- Test joint depth in the four zones. Apron, both wheel tracks, garage transition, and outside edge, with a blade dropped into the joint.
- Walk the full perimeter. Check the restraint for lift, rotation, gaps opening behind the last course, and lost material on the outside of the shoulder.
- Press on any suspect paver. Anything that rocks, clicks, or sits proud of its neighbors gets marked.
- Check both transitions. The garage threshold and the street tie-in are where settlement shows first and where a small lip becomes a trip point.
- Look for evidence of standing water. A tide line of fine silt, a discolored patch, or moss in one corner marks where water sat, even on a dry day.
- Check what drains onto the driveway. Downspout outlets, a planting bed graded toward the pavers, and a neighboring slope all deliver water the surface was not designed to take.
- Top the joints. Refill and compact anything low while the sand can still be worked dry.
- Write down what does not get corrected that day. Anything structural gets scoped and scheduled rather than patched.
What Makes Paver Driveway Maintenance Different in Lower Cape May County?
Four local conditions set the maintenance schedule here: sand under everything, a water table close to the surface, salt and flood water on the streets, and a season that decides when work can happen at all. A plan built for an inland driveway underestimates all four.
Sand comes first, and it cuts both ways. Barrier island lots in Wildwood Crest and Diamond Beach sit on sand and on decades of imported fill, which drains well and holds a load poorly. Drifted sand also lands on the surface constantly, and from standing height it reads as full joints, so a driveway that looks right often is not.
The water table comes second. On the flattest streets in Wildwood Crest and North Wildwood, groundwater sits close enough to the surface that a driveway cannot shed water downward. Everything has to leave across the top, which puts the whole burden on slope and on the perimeter, and makes edging and drainage the two details that decide how a coastal driveway ages.
Flood water is third, and it empties joints faster than anything else on this list. Street water that rises and recedes carries fine material in both directions. After a significant tidal event we expect to find joints low at the apron end of a driveway in Wildwood or North Wildwood, and soil pulled off the outside of the edge restraint.
The season is fourth. Rental turnover runs the calendar in Wildwood Crest, and a driveway carrying guest vehicles every weekend from spring into early fall is neither available for work nor getting looked at closely. Second homes compound it. An owner who visits monthly misses the early stage of every problem described here, which is how a low joint in April becomes a rocking paver in November. Booking the walk in the shoulder season is the practical fix, and it is part of why hardscaping ROI on rental and second-home properties tracks upkeep more closely than the original spec.
Where Do Transitions and Accessible Routes Fit In?
Transitions are where paver upkeep stops being cosmetic, because a settled paver at a threshold is a level change. The garage apron, the street tie-in, and any point where a walkway crosses the driveway have to stay flush, and all three sit over the parts of the base most likely to move.
On condo and commercial properties, an accessible route crossing a driveway raises the standard considerably. The ADA ramp guidance from the US Access Board treats a level change greater than one half inch, and any route steeper than 5 percent, as a ramp. It sets a maximum running slope of 1:12 and a maximum cross slope of 1:48, requires a clear width of at least 36 inches, and requires landings to be designed to prevent the accumulation of water. Settlement of a fraction of an inch in the wrong place can move a route out of those limits.
On a shared driveway that is worth checking on a schedule, because it changes slowly. Measure the same points each year instead of judging by eye.
What Separates Maintenance From a Repair?
The dividing line is the bedding layer. Anything above it, meaning joint sand, a lifted restraint, debris, or surface deposits, is maintenance and gets handled in a visit. Anything below it, meaning settlement, a soft pocket, or a loose trench, is a repair, and repairs mean lifting pavers.
That is better news than owners expect. A paver driveway is a segmental surface, so a failed area can be opened, corrected, and closed without touching the rest of it. The same units usually go back down, so holding a small stock of spare pavers from the original run is worth doing at installation.
The judgment call is whether a symptom sits above the line or below it, and that is what the walk is for. A paver rocking over full joints is a bedding issue. The same paver with three empty joints around it may simply need sand.
When something does have to come up, the sequence matters: lift, correct and compact the layer beneath, rescreed the bedding, relay, refill the joints, and compact the field again. A repair that skips compaction reproduces the original failure on a shorter timeline. If you are weighing a repair against a wider project, our hardscaping guide covers how these decisions usually sequence on a coastal property.
Frequently Asked Questions
These are the questions owners ask most often when we walk a driveway before winter.
How often do joints need topping up on a coastal driveway?
Check every year and expect to add sand more often than an inland property would. Storm and flood water move fine material out of joints faster here, and drifted sand on the surface disguises how far the joints have dropped. The refill stays small when it is caught early.
Why does the edge of my driveway keep spreading at the street?
The apron takes the highest load and usually has the least support behind the restraint. Every vehicle turning in loads that edge sideways, and if the compacted shoulder outside the pavers is thin or has lost material, the restraint tips and the joints open behind it. That is an edge repair, not a joint top-up.
What is the white haze on my pavers?
That is efflorescence, a deposit left when moisture carries salts through concrete and evaporates at the surface. It is cosmetic, common near the water, and it fades with weathering. It is not a sign the driveway is failing.
Is fall the right time to look at a paver driveway?
Fall is the best window of the year for it. Joints can still be refilled and compacted while the sand is dry, the summer rental season has ended so the driveway is accessible, and anything found can be corrected before winter cycling starts working on it.
A paver driveway on a barrier island is a low upkeep surface, not a no upkeep one, and nearly everything that goes wrong announces itself a season early in a low joint or a moving edge. An hour of looking in the fall keeps the work at the sand level instead of the base level.
Want the driveway looked at before winter? Call 856-386-4600 to set up a walkthrough.